First things first, to create the document. Now the sizes I listed to the left aren't necessarily the sizes that you absolutely have to use, you can pretty much use any size you want as long as it fits your text, but keep in mind that the bigger the document, the longer the process will take.
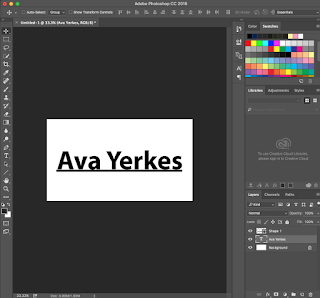
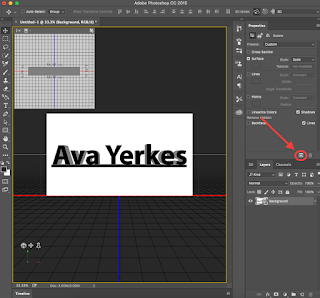
 This is the text I chose, I simply just did my name and I put a line shape underneath it so the 3D text will pop more. Next you're going to right click on the text layer and click "convert to shape". This should outline your text and now you can click on the text layer as well as the shape layer and merge them together using command E. After that, right click on the layer and all the way at the bottom it should say "New 3d extrusion from selected layer". Click that, and it should look like the picture below.
Now that we've converted to the 3d layer, we're going to experiment with the 3d tab and the layers so read carefully. You're going to go back to the layers panel and right click on background, then go all the way to the bottom and click postcard. All this does is put the background behind the 3d layer. Next, you'll combine the background and the text layer together and you should get the next picture below.
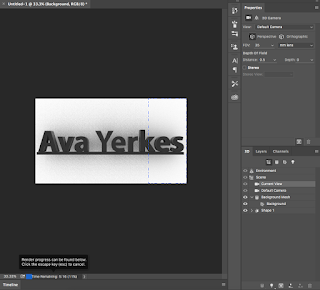
 After that, you can experiment with the 3d layers and figure out how you want your text to show up, but all I did was lower the extrusion depth slightly. Now you're going to click the cube in the properties layer (picture on the left) and it should start to render your layer, so it gives off the effect that really pops your 3d text. This process usually takes around 5 minutes for me, but again it depends on how big your document is.
 Now this is your final product! Feel free to change any colors of the size or your text, but this is what I ended up liking the most. Thanks for reading!


