Today we'll be reviewing Hexadecimal codes, RGB, and RGBa. All 3 codes involve colors, but can give them different forms or give them a different look, or also how much we control the shade of the color.
Hexadecimal Codes
Starting off with Hexadecimal codes, you can use letters and numbers, and they can either be 3 or 6 characters. It ranges from 0, being black, to 9 and then A to F, being white. Any of the numbers or letters in between can determine what shade of color you'd like, and usually the characters are in pairs and they can be either red, green, or blue and you can higher or lower the codes on those to establish different colors.

RGB & RGBa Codes
RGB coding involves no pound sign (#), no letters, 3 numbers, and it can go up to the number 255.You can use this for regular coloring, but if you want to add some transparency you can set your settings to RGBA. The only difference is that there are 4 numbers in RGBA, it can go up to the number 225, and the A at the end stands for alpha and is used to determine the transparency. It normally ranges from 0-1. Zero being see through and 1 being almost a completely white background. You can use the numbers in-between, such as 0.2 and 0.8, to determine how much you want to see through your box.

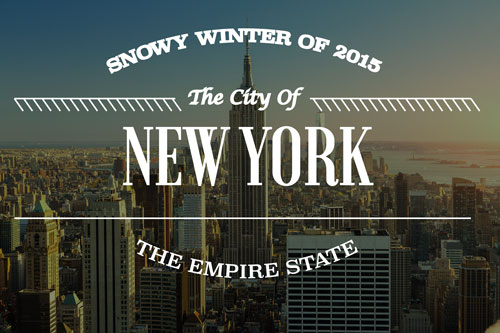
Above is what an RGBa code would look like, you can see the last number, the alpha, is a decimal and since I want my box to be partially see through, I made it a low number and the other 3 numbers just determine what shade I want the background to be.
We need this skill to make websites and we want to make a box with information in it, but have it show through to some pictures in the background. Anyone wishing to have maybe a slideshow in the background or a lighter feeling of their website should use this tool because they can still have information about their website on their page but at the same time being able to see the whole thing.
In conclusion, there are many different ways to use color codes and many different ways you can make them appear.
Below are some websites you can access to make you codes the best of the best:
HTML Color Picker
Color Explanations
RGB Color Channels


 During this project, I learned how to make individual slices in photoshop and then save them and put them in a div in dreamweaver to make it look good and work good. I really liked this project because we got to discover new ways to use our server on internet exploer and make it presentable for both macs and windows computers.


 When I first started this project, I thought of making a website about Broadway or Photography, one of my many hobbies after school. In the end, I decided to go with something that made me happy and I could find plenty of information on. Along the way, I learned many new ways to add in coding, different color schemes, plenty of new information on Mac n' Cheese, and embedding images and videos.
 This project definitely helped me learn how to do width and rounded corners that I will most defiantly use for future projects. I think I'll change the layout more next time and try to experience some new feature with Dreamweaver that I haven't tried yet. I really loved this project because we got to incorporate everything we've learned and I got to write about something that I'm passionate about. Check out all my pages, as well as the website it self with the link below!